<body><script type="text/javascript"> function setAttributeOnload(object, attribute, val) { if(window.addEventListener) { window.addEventListener("load", function(){ object[attribute] = val; }, false); } else { window.attachEvent('onload', function(){ object[attribute] = val; }); } } </script> <iframe src="http://www.blogger.com/navbar.g?targetBlogID=515384464305627497&amp;blogName=(dot)luv&amp;publishMode=PUBLISH_MODE_BLOGSPOT&amp;navbarType=SILVER&amp;layoutType=CLASSIC&amp;searchRoot=http://dotluv.blogspot.com/search&amp;blogLocale=en&amp;homepageUrl=http://dotluv.blogspot.com/&amp;vt=6705687602058325678" marginwidth="0" marginheight="0" scrolling="no" frameborder="0" height="30px" width="100%" id="navbar-iframe" allowtransparency="true" title="Blogger Navigation and Search"></iframe> <div></div>
its glitter time
14 December 2011


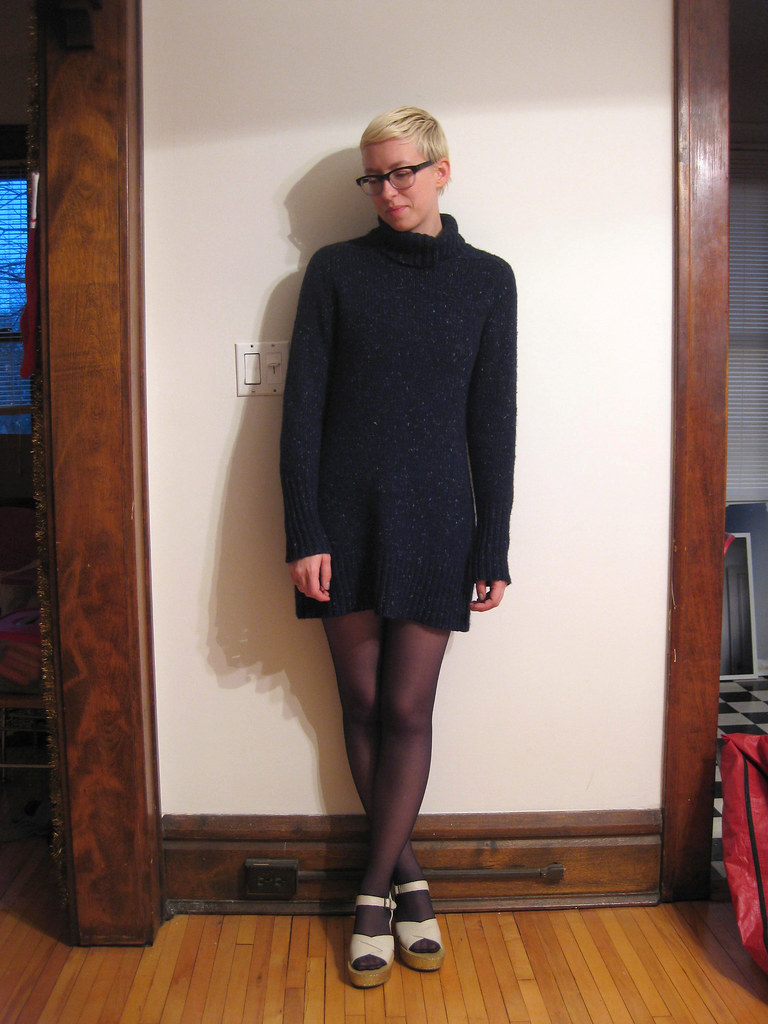
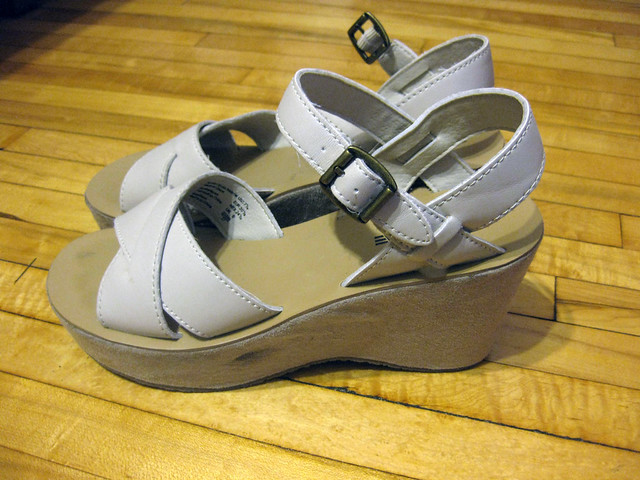
In keeping with the holiday festive-ness of my recent blog posts, and in preparation for a Sparkle themed birthmachristavus (aka Holiday Party) this weekend, I finally got around to doing a glitter DIY that I have been meaning to do ever since these puppies popped up on the internets and broke my little heart. Why is it, that even when I find an amazing pair of shoes that I HAVE TO HAVE and they are a measly $22 at Forever 21, I still have to hemm and haw over whether or not to buy them!? Well no more people, because as affordable as that pair was, this remake that I whipped up, cost me even less! And now I have both the shoes of my dreams and the pride to say that I did it myself!


Now, I wont go too far into the details, since there are so so many how-tos for this kind of thing out there. BUT. I just have to say that it was so so easy. I took some pointers from this lovely lady and her tutorial, but did it a bit differently as well. The two big differences were that I 1) bought a pair of shoes from Savers that were covered in a suede-like material on the wedge sole part. I did a little reading and it seemed like glittering suede was not such a good idea, so I had to exacto-knife that crap off. Not too bad, no cut fingers or anything!


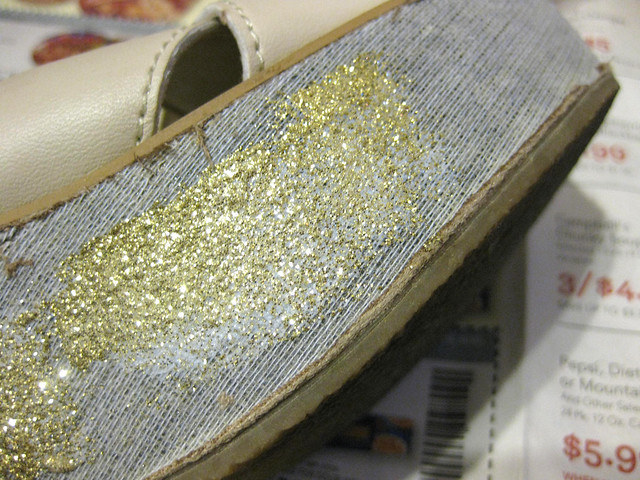
Then, 2) Kaylah recommends that you use a matte modge podge medium, but I used glossy. I dont know about you, but glitter just screams SHINY to me, and I didnt want to do anything that would cut back on the SHINY factor, you know what I mean?

ingredients:
1 Pair of Shoes (I got mine at Savers for $5, originally from American Eagle, and removed the suede)
1 tube of Modge Podge (I used Glossy)
1 container of Martha Stewart glitter in gold (I got the huge size because, why not?)
some sponge brushes
2 plastic containers to mix/keep the mixture in
newspaper to cover your work surface

Total cost of supplies for this project? $17 BUCKS!


et voila! GLITTER SHOES!

And because I was excited about my ability to glitter things, and the excess amount of glitter I had on my hands, I was all like, "so what else can I glitter in this joint?!?" I actually ended up glittering a plastic back cover for my iPhone as well! Glitter everywhere!! (more photos on my Flickr, as always)


6:38 PM |


A Minneapolis girl's obsessions with art, design, food, fashion and everything vintage. Watch out!
view my complete profile.
follow this blog with bloglovin'!

Follow (dot)luv
www.flickr.com
This is a Flickr badge showing items in a set called clothes. Make your own badge here.
photography work
allisonvallant.com
Please dont use my text or images without my permission. ©2012 Allison Vallant. All Rights Reserved
Basic blog template by Jacquelyn